Last year, I posted some photos on the Land for Wildlife SEQ Facebook page showing a group of Long-eared Bats (Nyctophilus spp) using a roost made from some plant pots and old jeans. Much to my surprise this became one of the most shared and commented on posts for both the Land for Wildlife SEQ and Sunshine Coast Council Facebook pages! This article is a follow up to this post to provide information on how to make one of these bat roosts.
How to make your own Microbat Roost
- Find some old jeans and cut the legs off! How long the legs need to be will depend on what they will be hanging out of. Options include a plant pot, bucket or old gumboot – let your imagination decide. The example shown here uses a plant pot, which is useful because the holes at the base of the plant pot will be used to secure the jean legs. The legs need to hang down enough (30-40 cm) for the bats to fly to them and then crawl inside.
- Tie the cut ends together so that each leg is sealed up. You can sew the open leg ends together or just put a cable tie tight around each leg. In this example I used cable ties.
- Secure the legs (sealed up end) to the inside of the pot. Cables ties through the jeans and drainage holes were used for this.
- Weather proofing (optional – if your roost will be under cover this step is not required). As this roost was originally going to be outside, I used some leftover roof insulation and ducting tape to seal the drainage holes to minimise water entry, making sure to put some rope through the holes before sealing. A second pot was placed over the top for extra insulation. This has also created great habitat for mud-dauber wasps!
- Hang the roost high enough so the bats have at least a 3m clearance above the ground. When the bats leave the roost in the early evening they drop out and fly away.
- Wait and be patient. It can take a while for your local bats to find the roost. In my case it was probably 2-3 years before I noticed it being used. Usually, the first signs of occupation are small (less than 1cm), elongated scats under the roost.
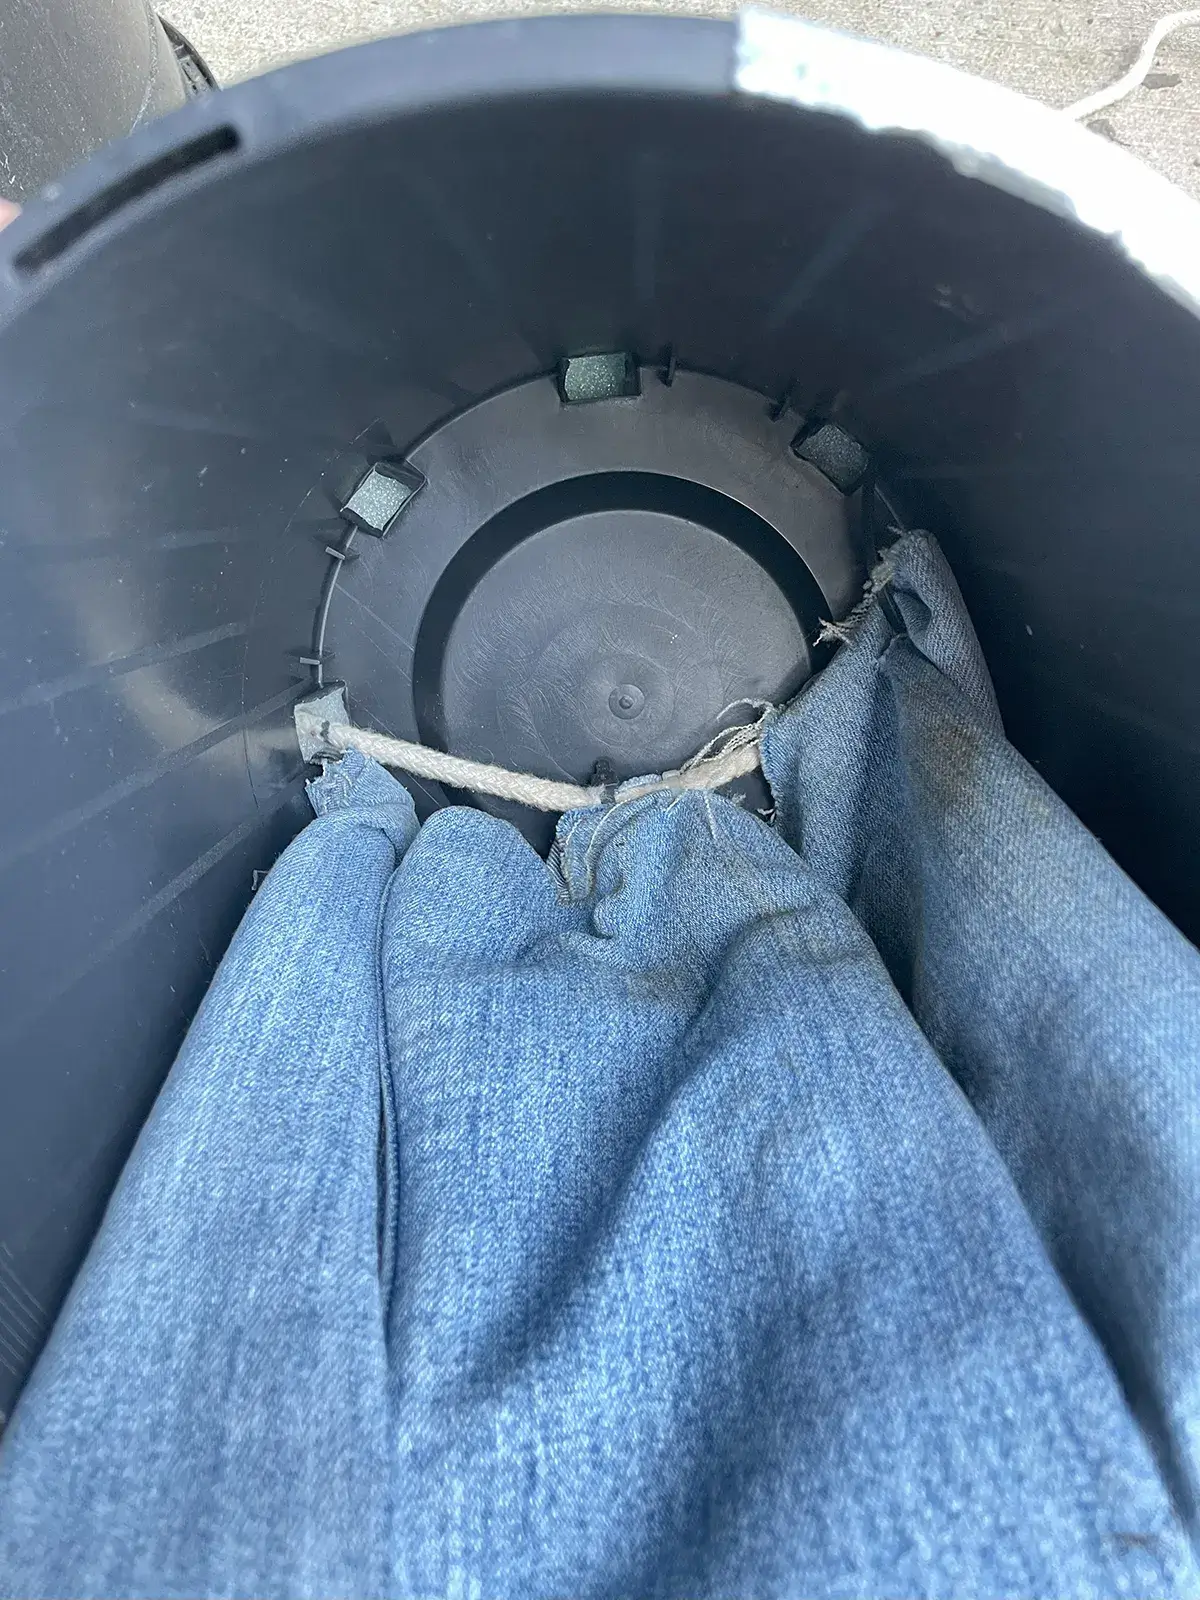
Attach cut jean legs to inside of pot
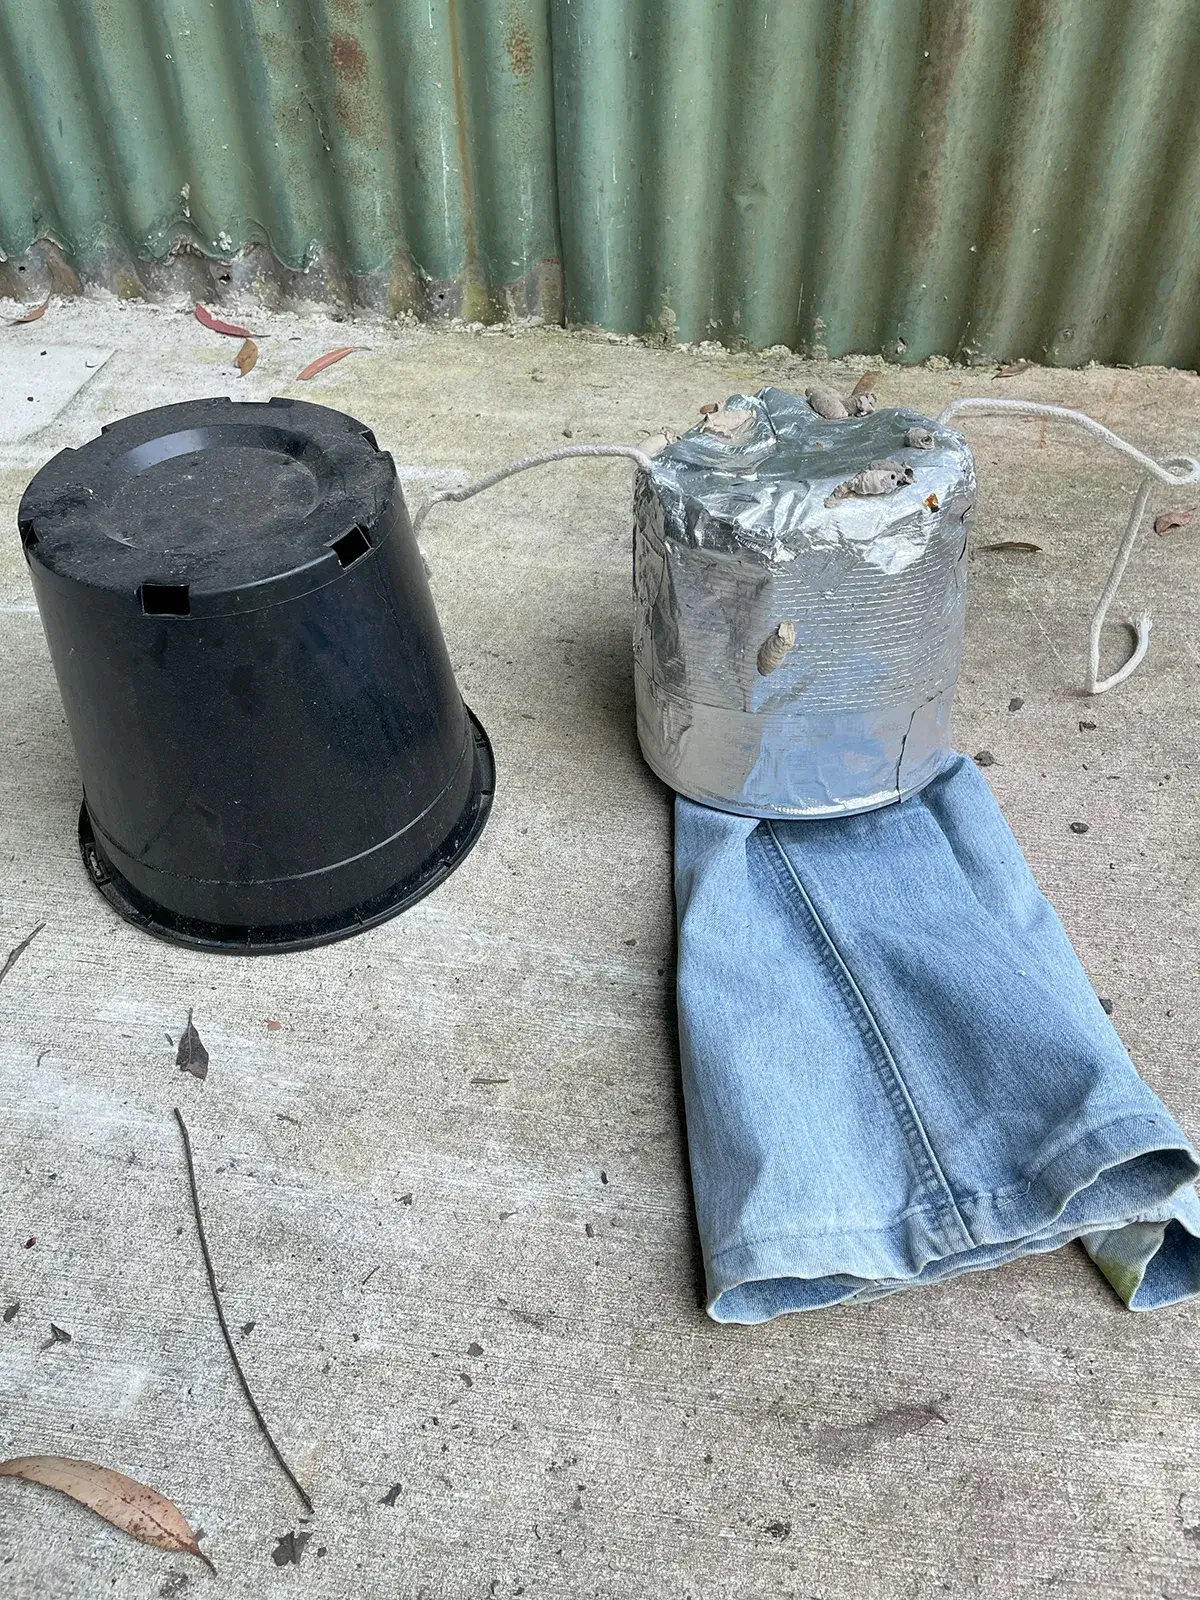
Optional weatherproofing
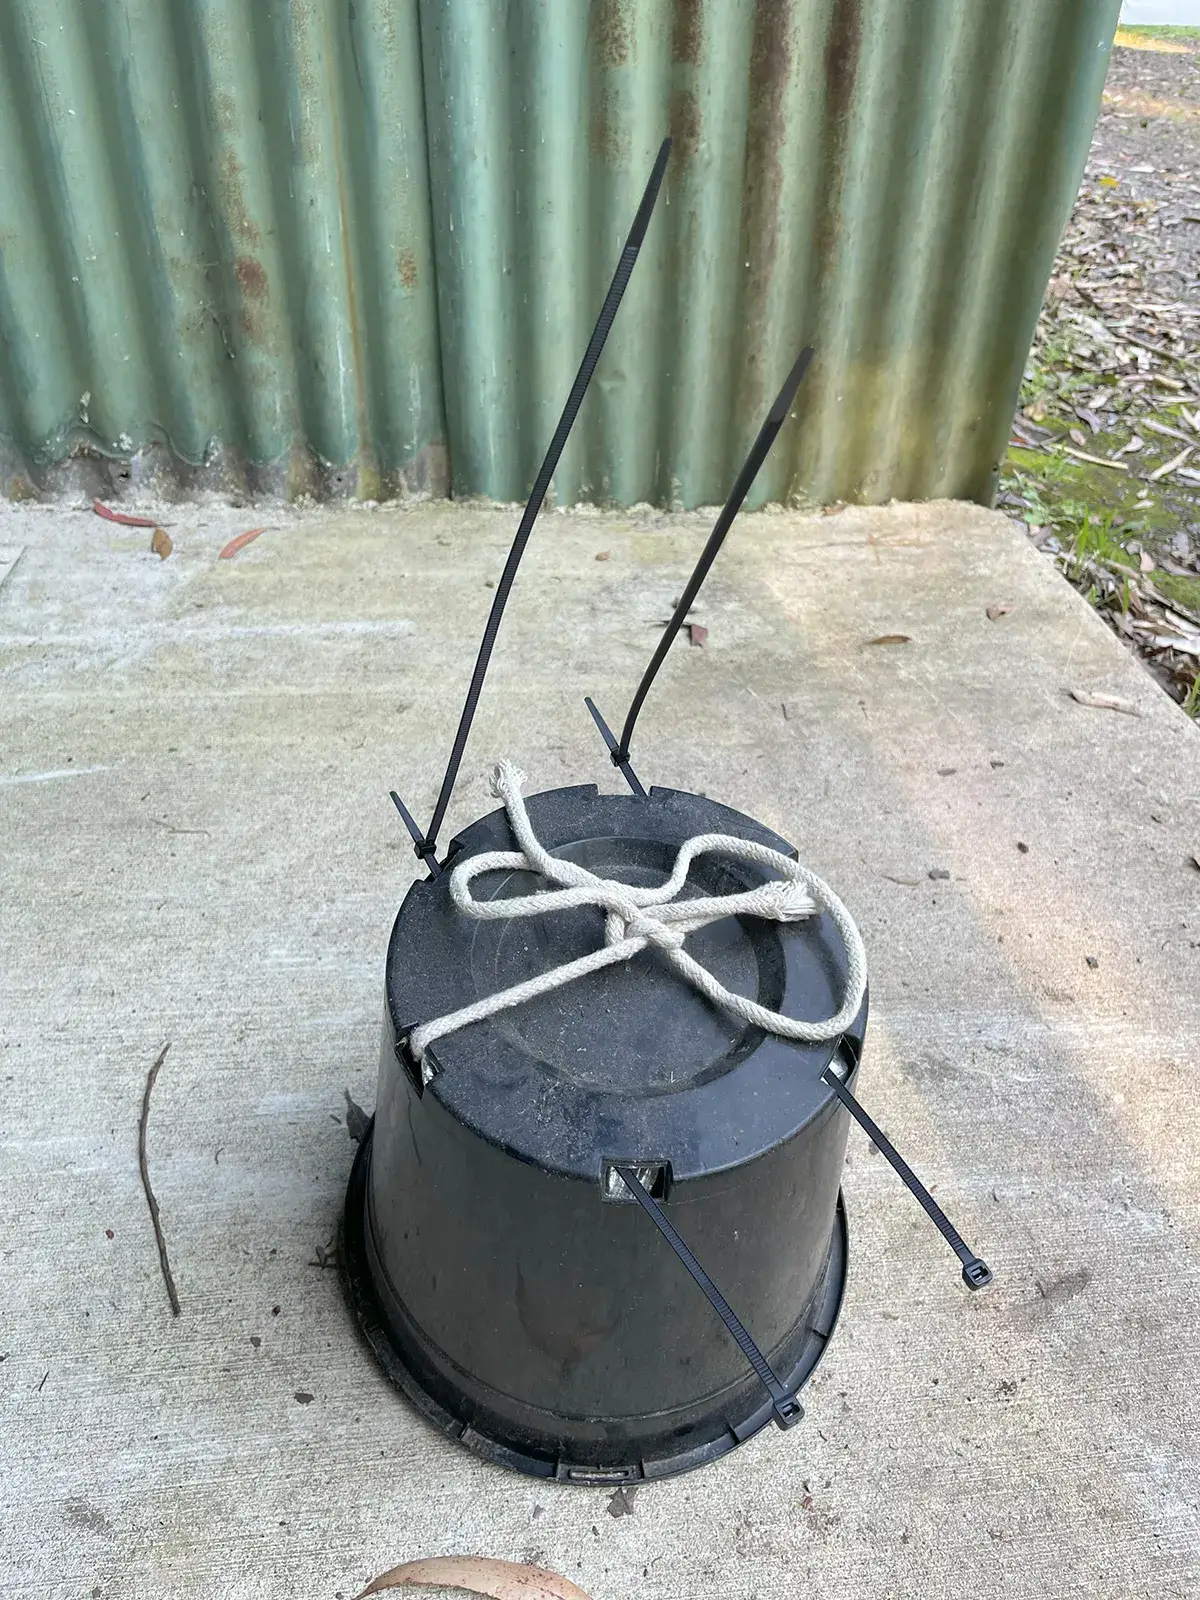
Ready to install
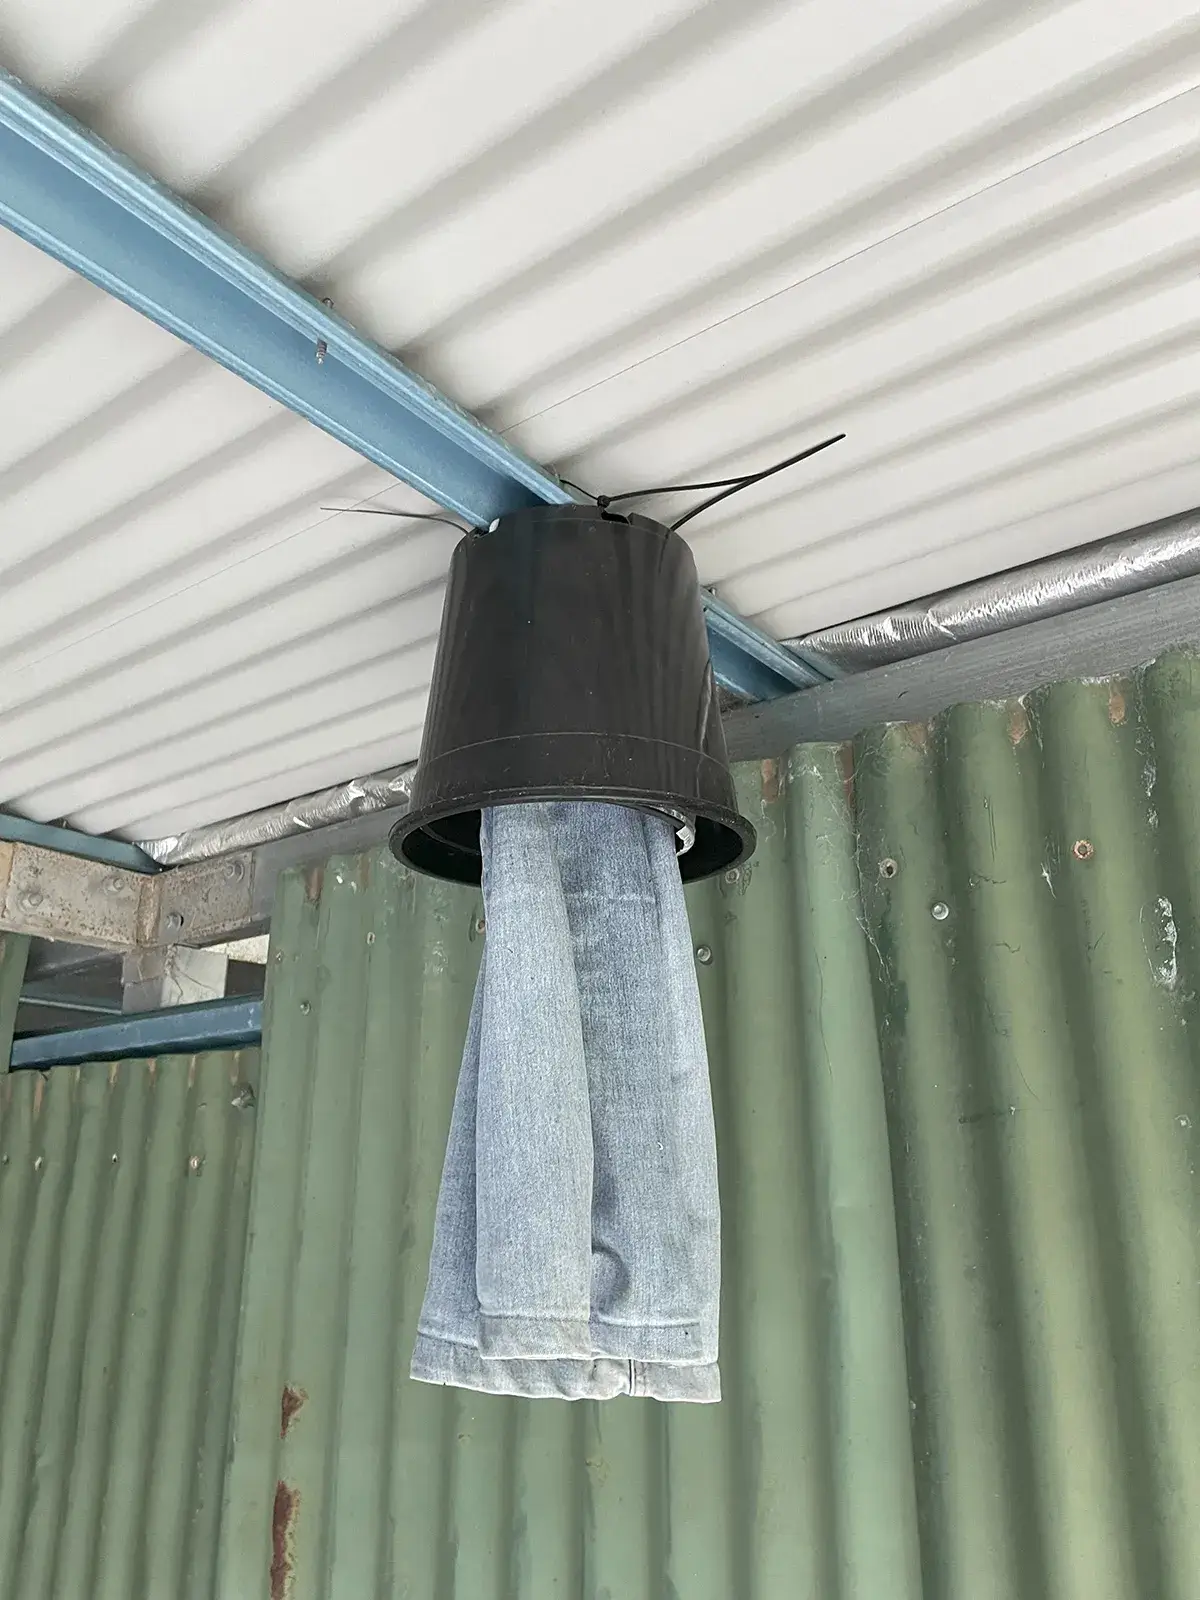
Installed
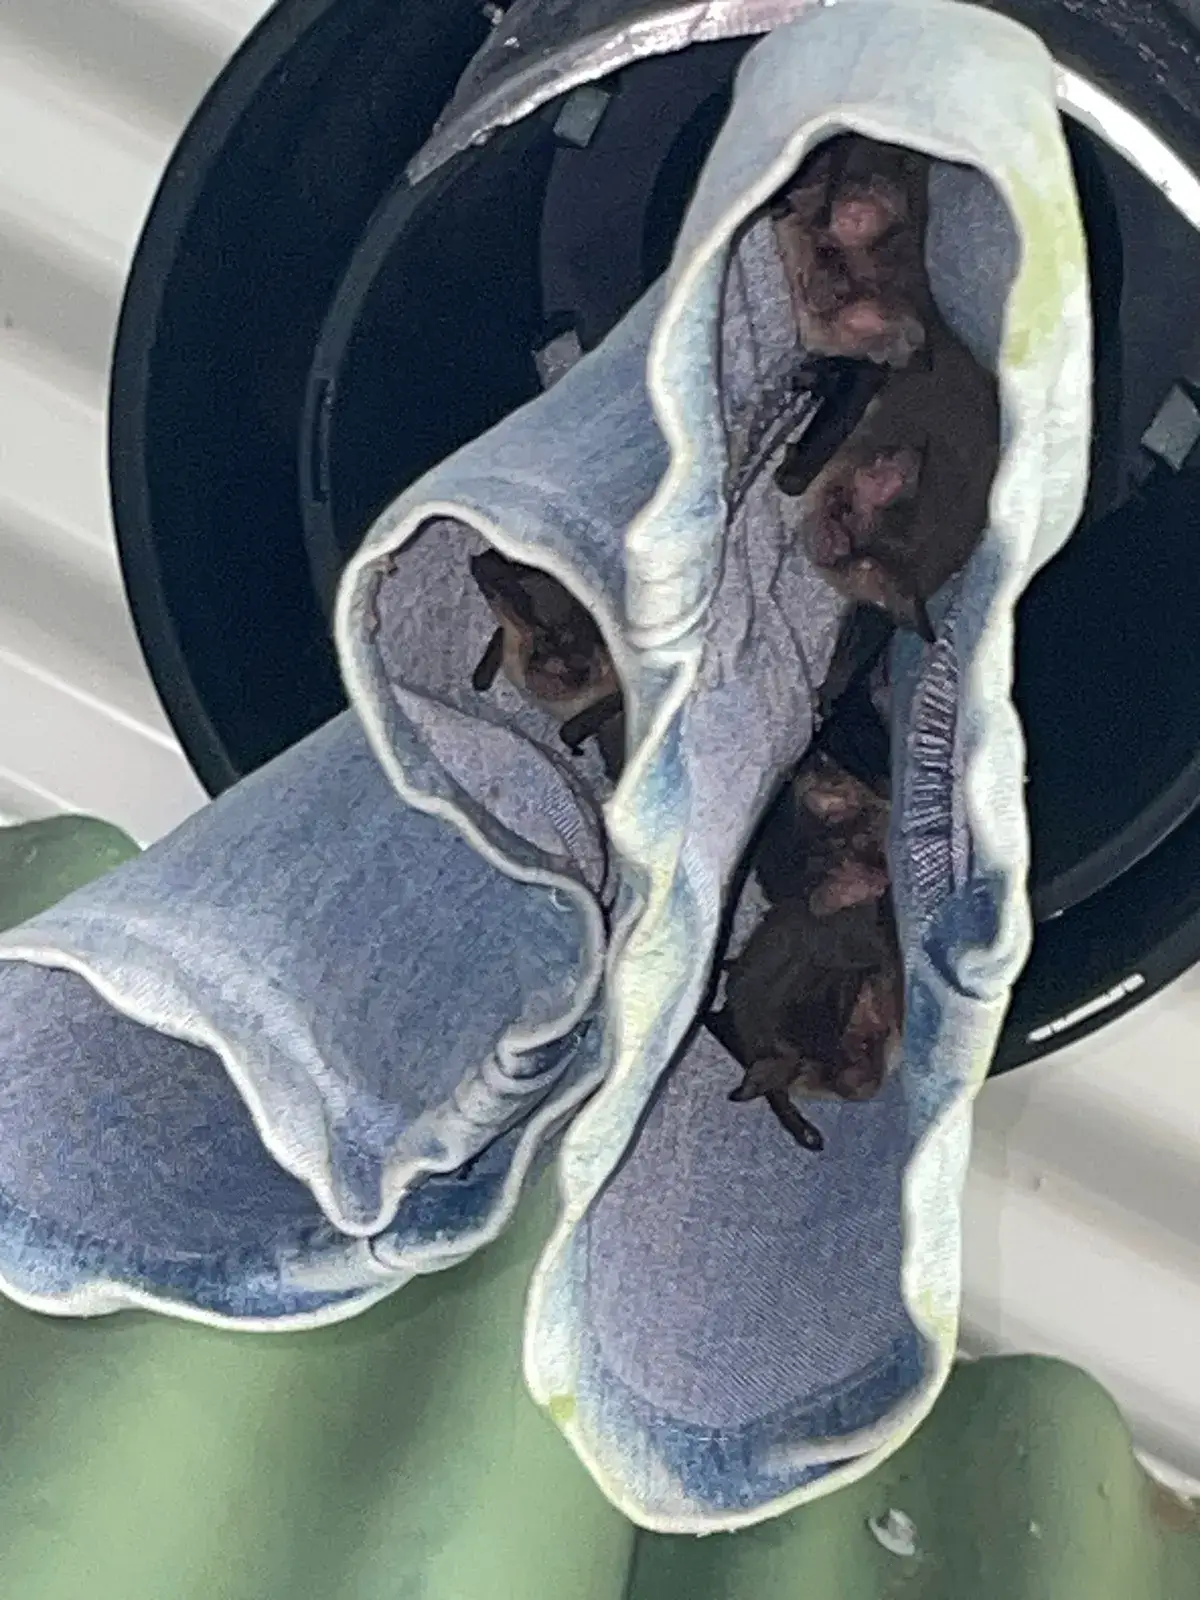
Wait. Be Patient. Bats!
A few more tips
- Use your imagination. This design was a result of the materials available at the time. A bucket or gumboot might be an easier waterproof option than plant pots. A folded beach umbrella or raincoat attached to a tree trunk or branch may be just as effective.
- If possible secure the roost firmly. This one was hanging from a rope and moved about in strong winds, so it seems like it was only used as a back-up optional roost in very rainy weather. Since taking these photos, I have reinstalled it firmly with large cable ties to reduce movement.
- This style of bat roost will usually only work for species of microbat that naturally roost under loose bark. Species that rely on caves or very large hollow trees are unlikely to use them. These Long-eared Bats are known to roost in tree hollows, epiphytes (eg. staghorns and elkhorns), under peeling bark and sometimes in banana bags! Identifying microbats to a species level can be quite difficult as there are about 25 species of microbats in SEQ and they can look very similar.
- Admire the bats from a distance and never handle them. If bitten or scratched seek medical advice immediately as bats can carry diseases that can be transferred to humans through bites and scratches.
Microbats are probably the most overlooked group of mammals in SEQ. They are great to watch flying around fast on dusk. They eat a wide range of invertebrates such as moths, mosquitoes, beetles, flying termite alates and spiders. Microbats are important natural controllers of pest insects in agricultural environments and they help maintain a balance of invertebrates in ecosystems. Consider yourself lucky to have microbats around and goodluck with your DIY microbat roost.
Article and photos by Michael Reif
Land for Wildlife Officer
Sunshine Coast Council